Prerequisites
What you need
-
A Linux based machine that has a Bluetooth HCI interface
In this tutorial we are going to use a Raspberry Pi 4 running Ubuntu 20.04 for Raspberry
IMPORTANT NOTE : It is actually MANDATORY to use Ubuntu Server 64bits 20.04 LTS3 (arm64) if implementing Matter support on Raspberry Pi
Any other distro, including Raspbian will not allow you to build required Matter tools
Still this could be achieved on any other Ubuntu 20.04 system that has a BLE interface
-
Enable ssh on your Raspberry Pi (Optional, only if you do not use the RPi's HDMI interface)
You can find a nice guide on how to achieve this according to your RPi usage on this PhoenixNAP Knowledge Base Article
You will also need an SSH client if you are connecting remotely to the Raspberry Pi or Build computer :
- PuTTY
- A good old Linux terminal (For Windows users, WSL can achieve this)
-
A Silicon Labs Wireless Starter Kit which can support Thread developement
Full list is available on this page
Preferred and most economic option being our Thunderboard Sense 2
-
gitinstalled on your build machineFor above mentionned systems a simple package manager installation should work
sudo apt install git -
A Jlink Flash Utility installed on your machine
This guide will use the JLink Package for Linux
But other options such as Simplicity Commander or Simplicity Studio Flash Programmer would also work
Note :
This guide does not cover how to get a Raspberry pi up and running. For that please refer to this guide
This guide does not cover how to perform a Linux installation on a computer. For this please refer to this guide
Getting started
-
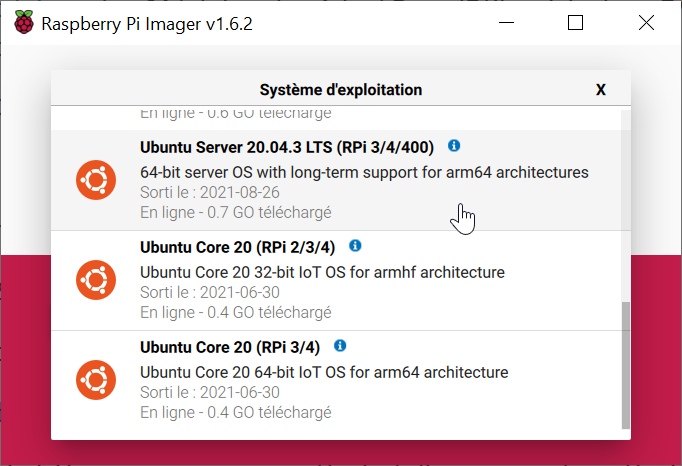
Flash your raspberry pi SD Card using Raspberry Pi Imager (For Raspberry Pi users only)
Remeber, do not flash the regular Raspberry Pi OS but Ubuntu Server 64bits 20.04 LTS3 (arm64) image

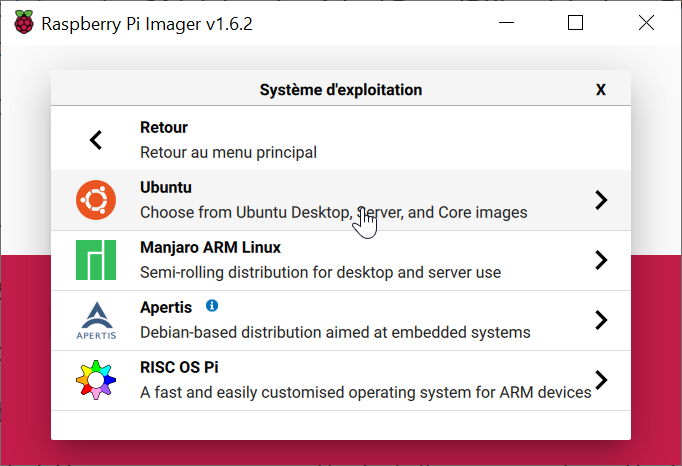
Default login and password are : ubuntu ubuntu
You will be asked to change it upon first login
-
Get the IP address of your Raspberry Pi (For SSH users only)
There are a few options here :
-
Use your router's management interface
-
You can use a network discovery tool such as Angry IP Scanner (Win, Mac, Linux)
A portable (no install required) executable is provided for Windows users
Just scan your subnet for open ssh ports if you do not have a lot of devices supporting it (port 22)
-
-
Open a terminal on your Raspberry Pi (either local or via ssh from one of the above mentioned options) :
For example using Linux/WSL ssh terminal command :
ssh ubuntu@192.168.1.18 - cd to your home directory if not already there :
cd ~/ - Create a dedicated folder within your /home/
directory for this development purpose mkdir ~/border_router_dev cd ~/border_router_dev - Check that you have git installed
sudo apt update
sudo apt install git
sudo apt update
If some packages can be upgraded feel free to do so, but ensure to run an apt update as last command
-
Make sure you have JLink Utilities installed
Go to JLink Download Page Look for the package that suits your platform and Download it
For ease of use in a command line environment, we hosted a few packages on a Dropbox:
For a raspberry pi setup running Ubuntu OS 64bit, downloaod as follows:
wget https://www.dropbox.com/s/yq7ncfc5y20b3hw/JLink_Linux_V758c_arm64.debThen install using :
sudo apt update sudo apt install ./JLink_Linux_V758c_arm64.deb sudo apt update -
Plug in your Thunderboard Sense 2 to your Raspberry Pi and check it is enumerated
ls -ail /dev/ttyACM* 450 crw-rw-rw- 1 root dialout 166, 0 Nov 29 19:14 /dev/ttyACM0 - Check that you can erase the Thunderboard Sense 2 using JLinkExe utility
-
First launch the
JLinkExeutility usingJLinkExe -device EFR32MG12P432F1024GL125 -speed 4000 -if SWD -autoconnect 1:JLinkExe -device EFR32MG12P432F1024GL125 -speed 4000 -if SWD -autoconnect 1 SEGGER J-Link Commander V7.58c (Compiled Nov 24 2021 17:29:09) DLL version V7.58c, compiled Nov 24 2021 17:28:52 Connecting to J-Link via USB...O.K. Firmware: Silicon Labs J-Link OB compiled Oct 3 2017 10:31:49 Hardware version: V1.00 S/N: 440162855 License(s): RDI, FlashBP VTref=3.233V Device "EFR32MG12PXXXF1024" selected. Connecting to target via SWD InitTarget() start InitTarget() end Found SW-DP with ID 0x2BA01477 DPv0 detected CoreSight SoC-400 or earlier Scanning AP map to find all available APs AP[1]: Stopped AP scan as end of AP map has been reached AP[0]: AHB-AP (IDR: 0x24770011) Iterating through AP map to find AHB-AP to use AP[0]: Core found AP[0]: AHB-AP ROM base: 0xE00FF000 CPUID register: 0x410FC241. Implementer code: 0x41 (ARM) Found Cortex-M4 r0p1, Little endian. FPUnit: 6 code (BP) slots and 2 literal slots CoreSight components: ROMTbl[0] @ E00FF000 [0][0]: E000E000 CID B105E00D PID 000BB00C SCS-M7 [0][1]: E0001000 CID B105E00D PID 003BB002 DWT [0][2]: E0002000 CID B105E00D PID 002BB003 FPB [0][3]: E0000000 CID B105E00D PID 003BB001 ITM [0][4]: E0040000 CID B105900D PID 003BB923 TPIU-Lite [0][5]: E0041000 CID B105900D PID 000BB925 ETM Cortex-M4 identified. J-Link>This will open a prompt in which you can issue flash commands to the device
- Then simply type
eraseJ-Link>erase Without any given address range, Erase Chip will be executed Erasing device... Unable to load library icui18n "Cannot load library icui18n: (icui18n: cannot open shared object file: No such file or directory)" JLinkGUIServerExe: cannot connect to X server J-Link: Flash download: Total time needed: 0.218s (Prepare: 0.156s, Compare: 0.000s, Erase: 0.053s, Program: 0.000s, Verify: 0.000s, Restore: 0.008s) J-Link: Flash download: Total time needed: 0.111s (Prepare: 0.075s, Compare: 0.000s, Erase: 0.027s, Program: 0.000s, Verify: 0.000s, Restore: 0.008s) J-Link: Flash download: Total time needed: 0.111s (Prepare: 0.075s, Compare: 0.000s, Erase: 0.027s, Program: 0.000s, Verify: 0.000s, Restore: 0.008s) J-Link: Flash download: Total time needed: 0.576s (Prepare: 0.075s, Compare: 0.000s, Erase: 0.489s, Program: 0.000s, Verify: 0.000s, Restore: 0.011s) Erasing done. J-Link> - Finally just leave the prompt by typing
qJ-Link>q pi@raspberrypi:~/border_router_dev
A dedicated KBA has been writen in our community for alternative help using the JLinkExe utility
-
-
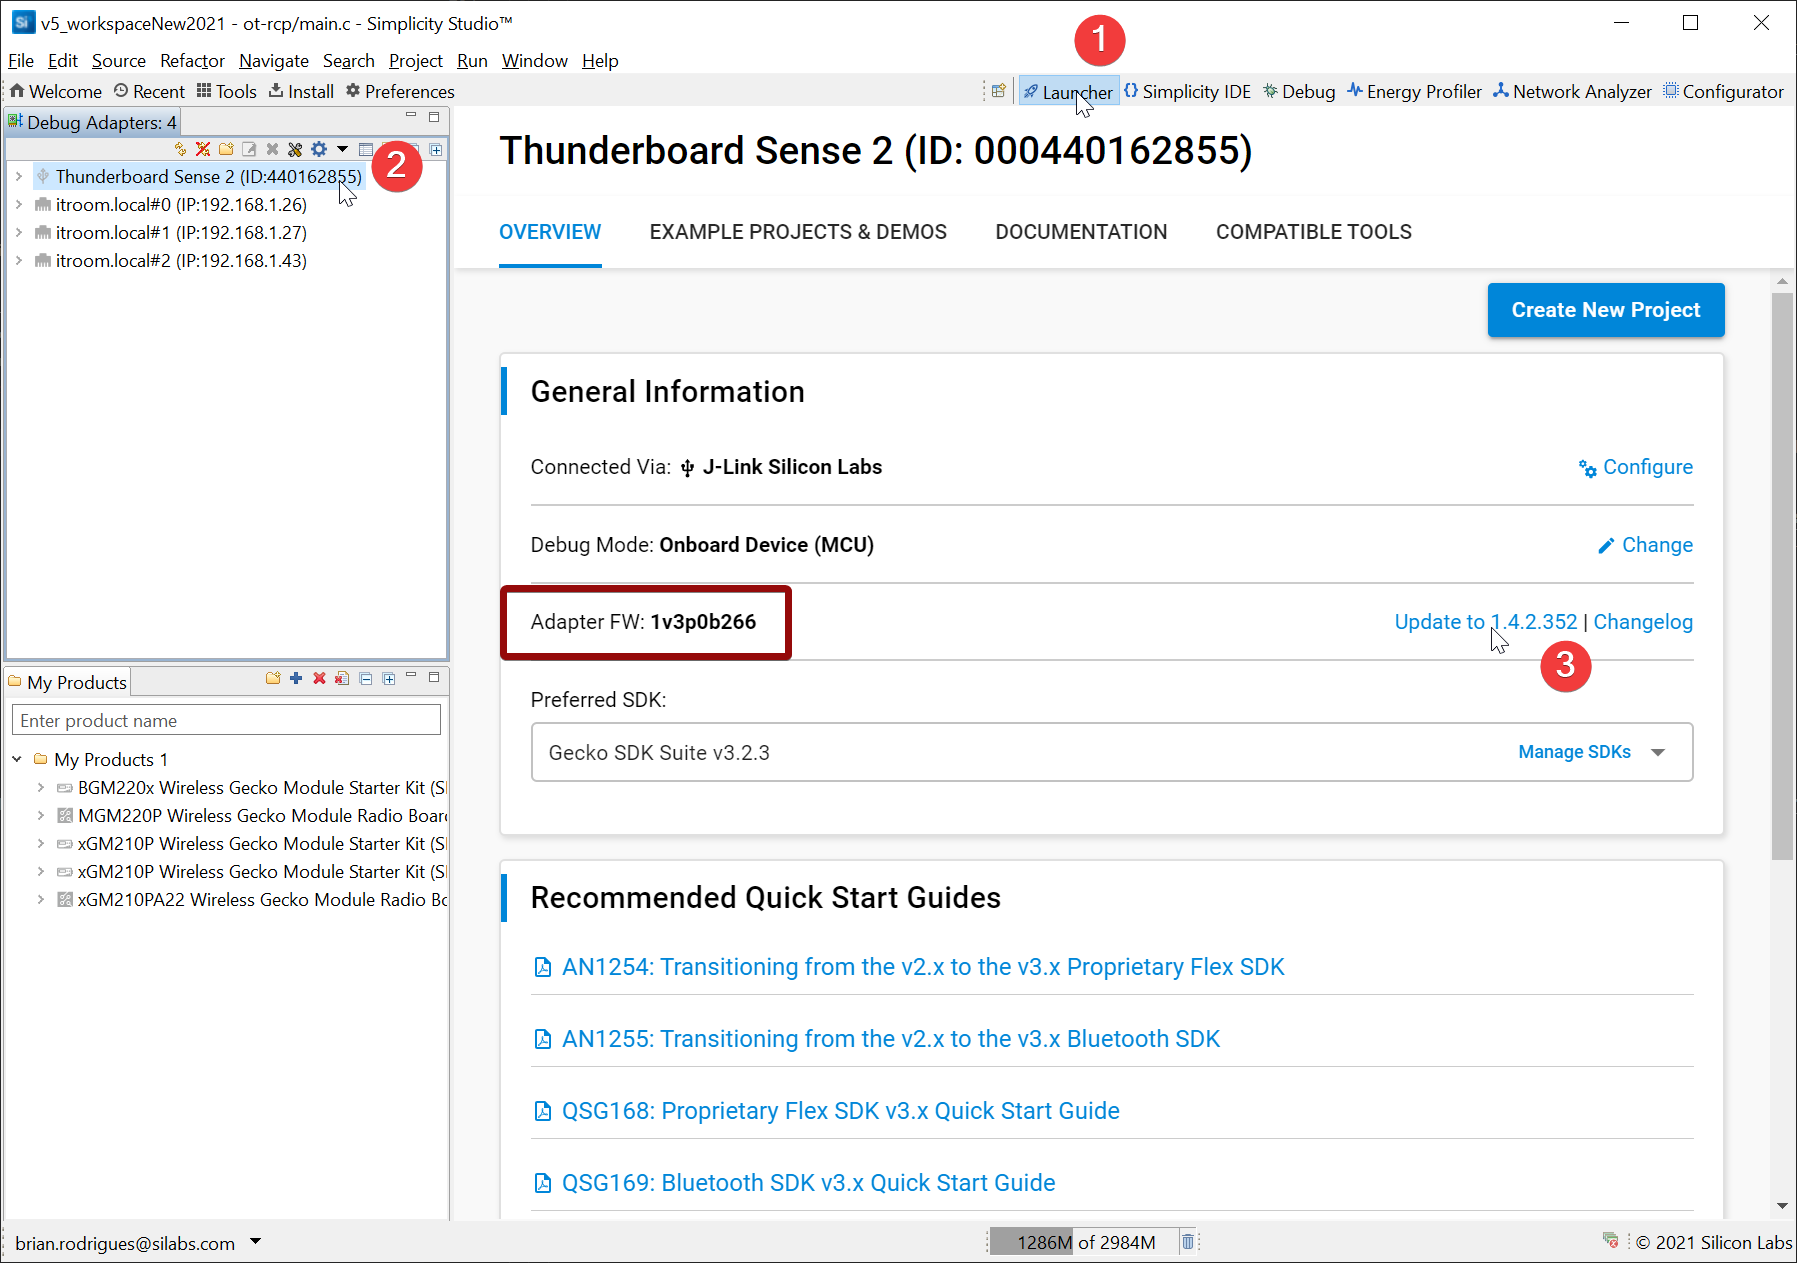
Update your Thunderboard Sense 2 Kit firmware with one that disbales UART HW Flow control
First verify your firmware version is later than 1v3p0
Otherwise you could face Border Router runtime errors such as RadioSpinelNoResponse
To do so use one of the 2 options below
At the time of writing (11/29/2021) there are two ways to update your Starter Kit's firmware
Both CANNOT be run on Raspberry Pi, only on Windows, Mac and Linux x86_64 platforms
-
Using Simplicity Commander Start by downloading the utility for your computer: Installer for Linux Installer for Windows Installer for Mac
Note that Commander is installed by Simplicity Studio in
<StudioInstallDir>\SimplicityStudio\v5\developer\adapter_packs\commanderOr install each package and dependencies according to their README
Download the latest firmware image from here
If already downloaded by Simplicity Studio, it can also be found in :
<StudioInstallDir>\SimplicityStudio\v5\offline\hwtools\firmware\S1015C_adapter_firmware_packageWithin linux usewget:wget https://www.dropbox.com/s/rlik7d0ktvuqv8h/S1015C_adapter_firmware_package_1v4p2b352.emzCommander can be used either by command line or GUI, the easiest being the GUI
GUI Verify and Install :

Command line Verify and Install :
The command documented in UG162 Chapter 6.8.1 is
$ commander adapter fwupgrade --serialno <J-Link serial number> <filename>To find your JLink serial number you can use JLinkExe :
JLinkExe
SEGGER J-Link Commander V7.58c (Compiled Nov 24 2021 17:29:09)
DLL version V7.58c, compiled Nov 24 2021 17:28:52

Connecting to J-Link via USB...O.K.
Firmware: Silicon Labs J-Link OB compiled Jun  6 2019 18:14:01
Hardware version: V1.00
S/N: 440162855
License(s): RDI, FlashBP
VTref=3.223V

Type "connect" to establish a target connection, '?' for help
J-Link>q
In our case :
$ commander adapter fwupgrade --serialno 440162855 S1015C_adapter_firmware_package_1v4p2b352.emzNote : As mentioned above, this does not apply to Raspberry Pi OS
-
Using Simplicity Studio Plug in your Thunderboard to the computer
And open Simplicity's Launcher Perspective :
-
- Redo 8. and 9. to ensure you still have your Thunderboard Sense 2 connected and writeable
Troubleshoot
If you precisely follow all of the previous steps, you should have a ready to use Linux envirnment
Still, if you run into some of these issues:
-
apt operations fails because of
E: Could not get lock /var/lib/dpkg/lockFollow method 2 of this knowledge article
-
ssh login fails due to existing known_host
This is due to the fact that you already had connected using ssh to the host but might have flashed a new linux distro on it
As per
sshshell feedback, usessh-keygen -f "/home/brian/.ssh/known_hosts" -R "<your_target_ip>"