Create an OpenThread Network
At this point the only remaining step is to create a thread Network
There are two ways of creating it, either through the OpenThread GUI interface or via ot-ctl
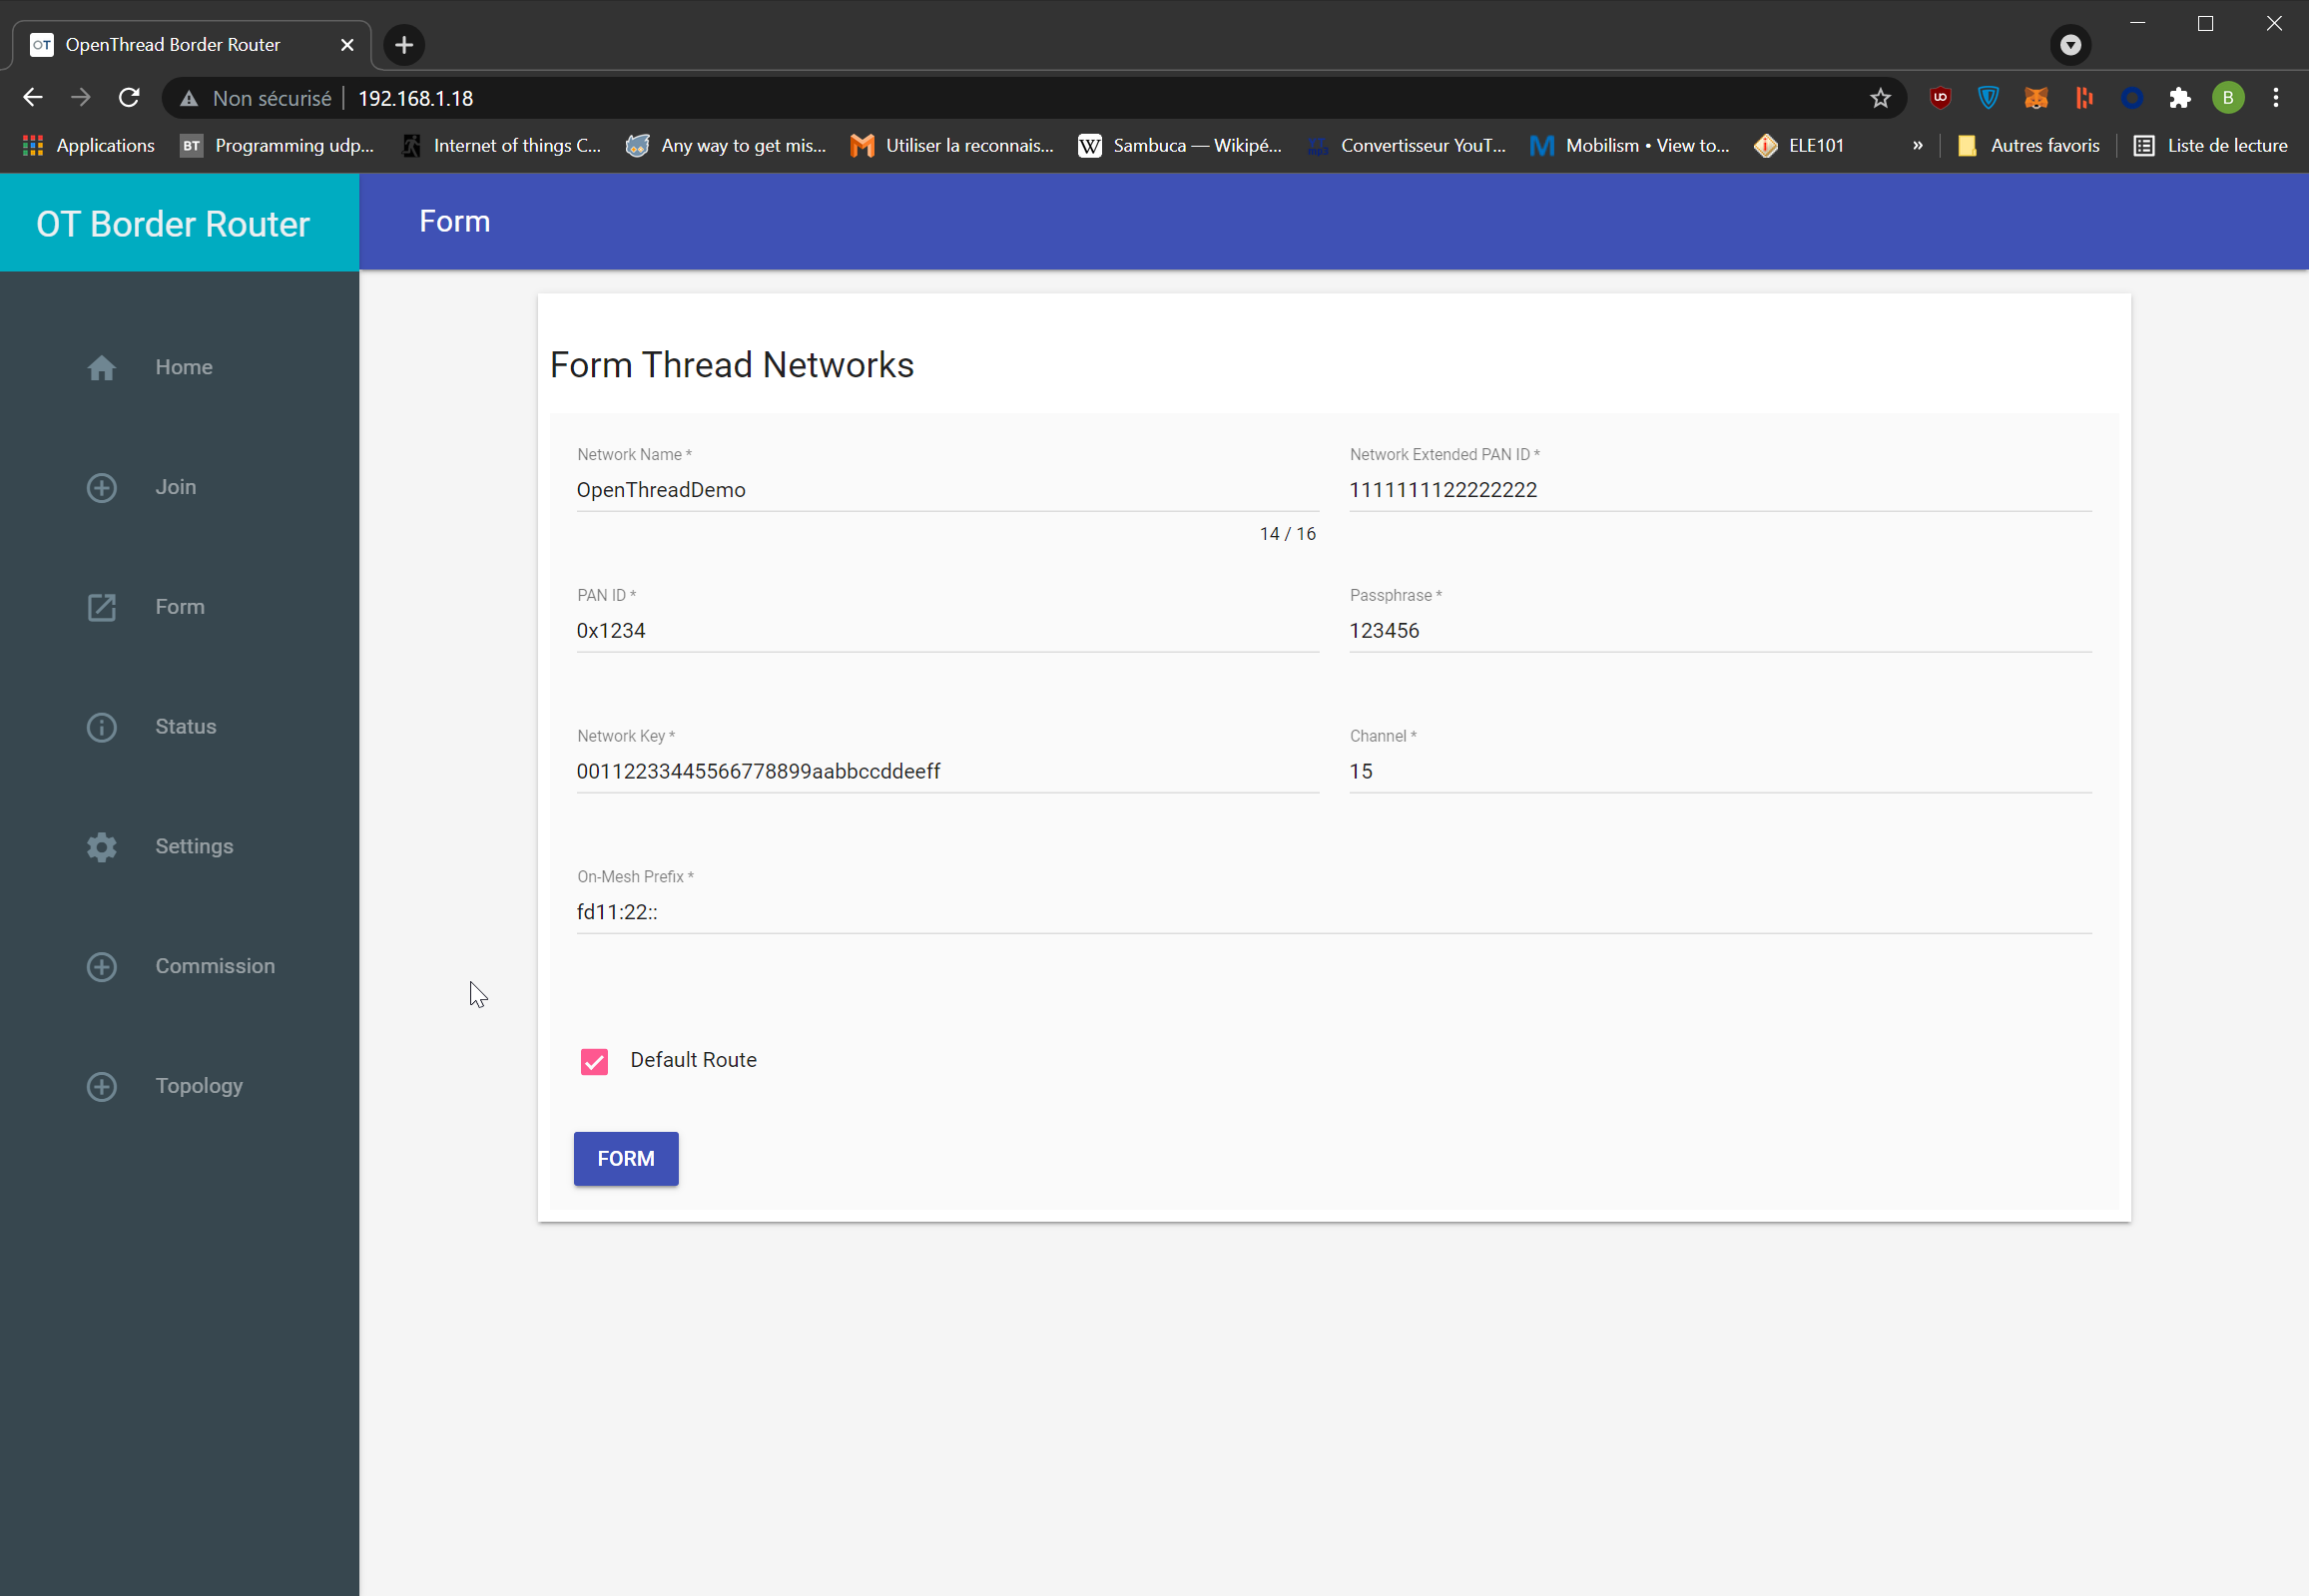
Creating Network using the Web User interface
Use a webbrowser from a device on the same ethernet network as your Raspberry pi
-
Browse for the ip address of your raspberry pi :
http://192.168.1.18 -
Go to the ‘Form' section of the web page
-
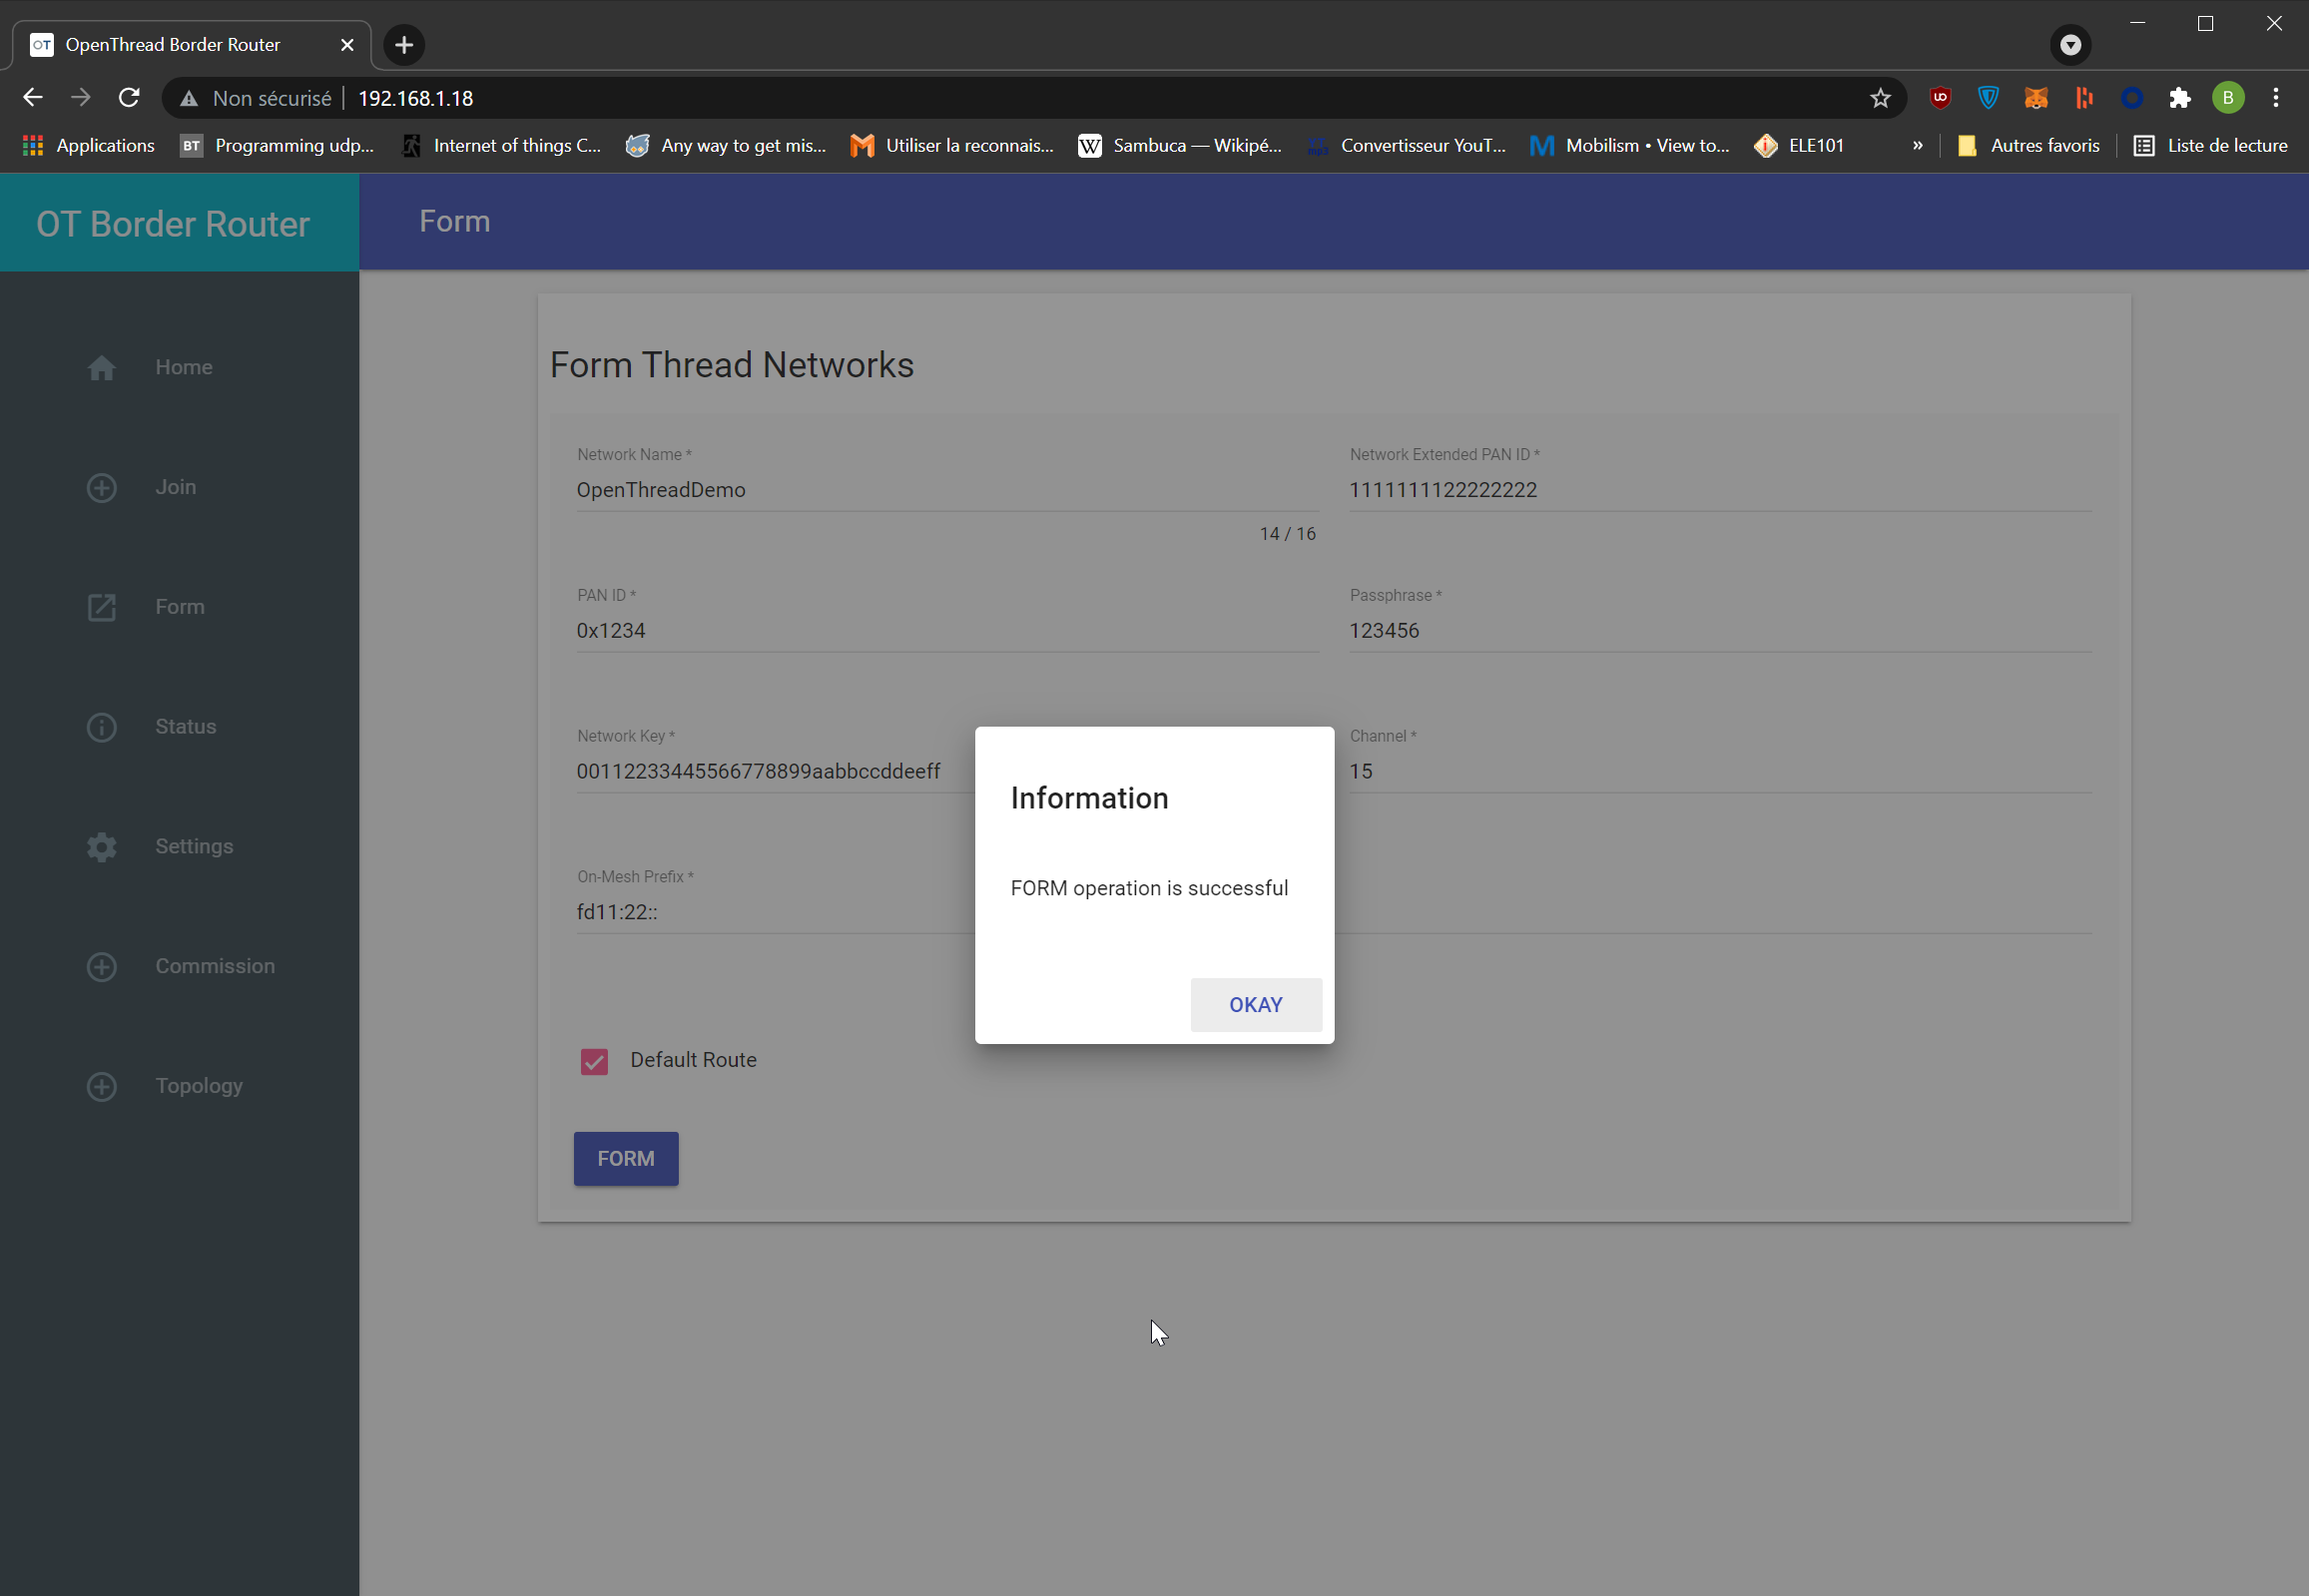
Click Form
A message should pop up to let you know about the operation success
-
Check your OpenThread network status by going to the
Statussection of the web ui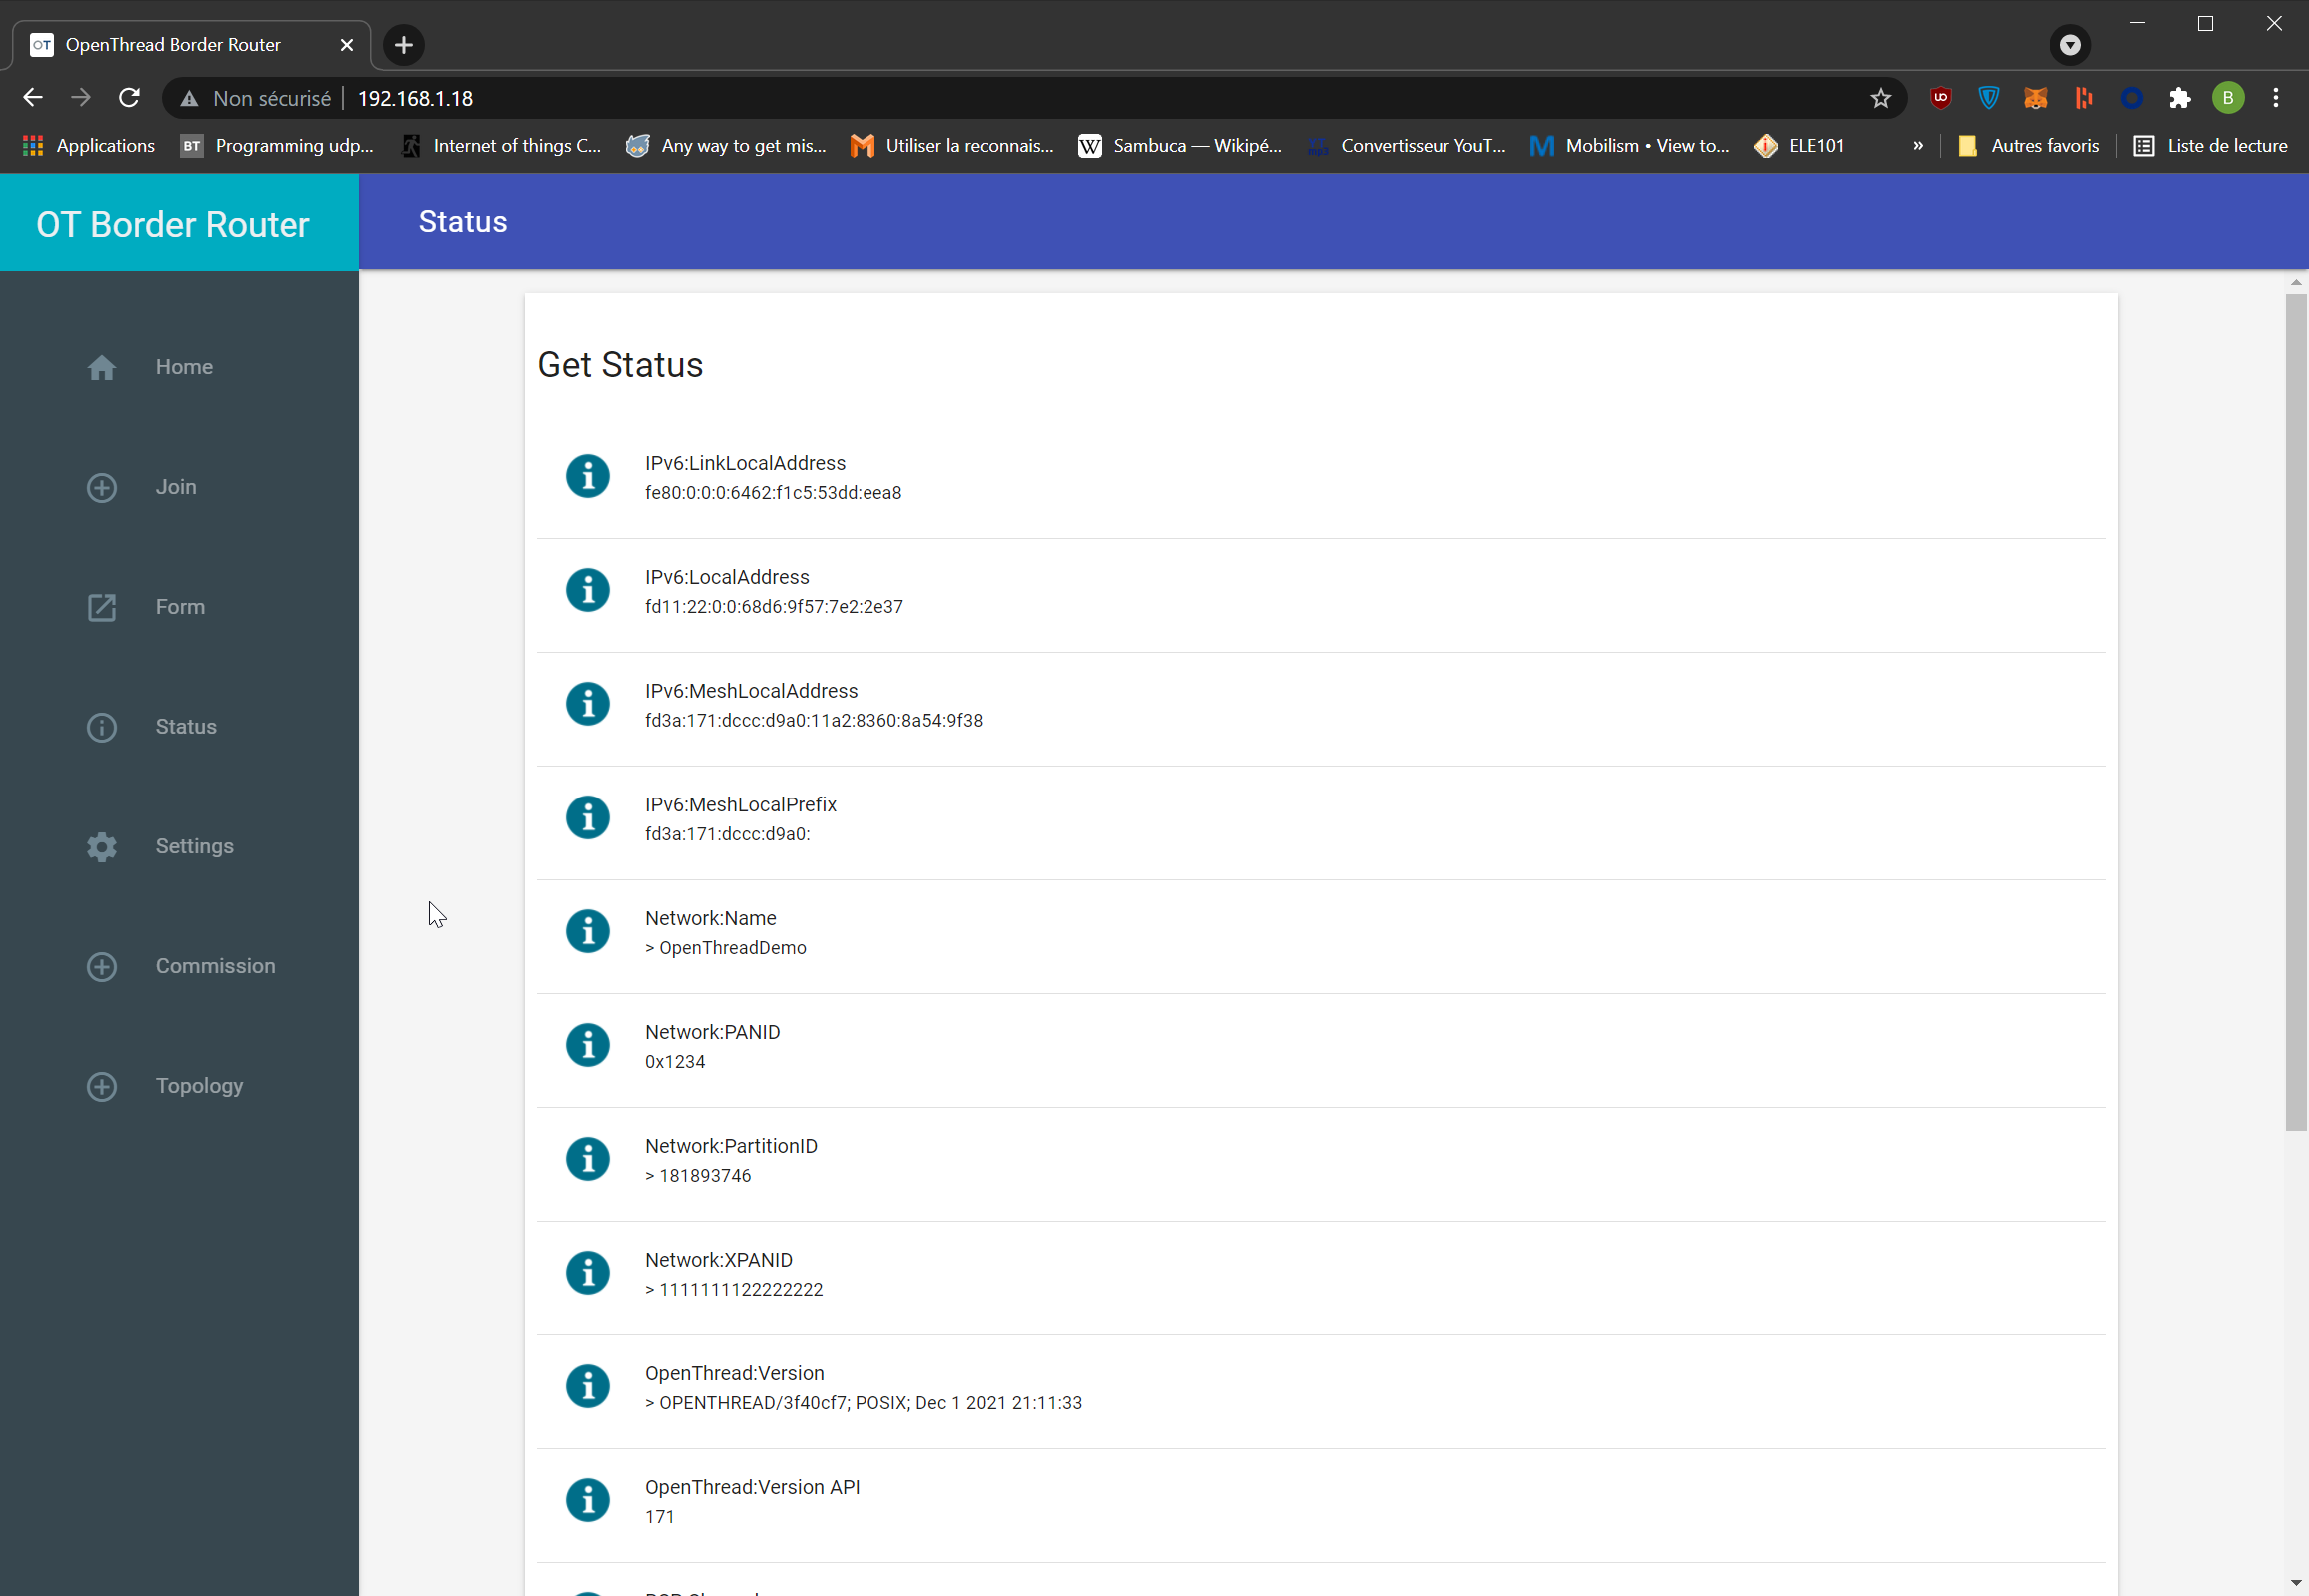
These steps are well covered in the official Border Router Guide
Creating Network using ot-ctl
Run the following command to enter ot-ctl prompt :
sudo ot-ctl
>
Then factoryreset. This one will need a double enter press to apply and bring back prompt
> factoryreset

>
Finally type the remaining ones :
> prefix add fd11:22::/64 paros
Done
> thread stop
Done
> ifconfig down
Done
> ifconfig up
Done
> thread start
Done
> state
leader
Done
> exit
The fact that you have a leader proves your network is up
You can also check the status of your network on the web ui
IMPORTANT NOTE: These commands won't retain your network configuration
To have a non volatile network configuration follow this Manual Setup Guide or use the Web GUI